Home Assistant can translate text natively now that you’re running LibreTranslate on your own hardware. The integration isn’t built-in, but the REST API makes it straightforward to add translation logic to automations, scripts, and templates. This matters if you’re pulling foreign-language notifications, sensor data, or user input and need it readable without sending anything to Google or OpenAI.
Why Translate Inside Home Assistant
Home Assistant already sits at the center of your homelab. It talks to every room, every device, every sensor you own. Occasionally it receives text that’s not in your language: a weather alert in Spanish, a smart display message in French, logs from a foreign service. You have three bad choices. One: ignore it. Two: send it to the cloud and hope nobody’s reading. Three: run translation locally and keep it all internal.
LibreTranslate running in Docker on your lab hardware is choice three. The performance hit is real — translation takes a second or two per request, not milliseconds — but it’s private and it works offline.
Home Assistant doesn’t have native LibreTranslate support yet. No official integration. What it does have is the ability to make HTTP requests and parse JSON responses. That’s enough to build what we need.
Prerequisites and Hardware
You need LibreTranslate already running. If you don’t have it deployed yet, the Docker setup is trivial. I’m assuming it’s accessible on your local network at http://libretranslate.local:5000 or similar. Adjust the hostname to match your setup.
Home Assistant should be running somewhere on the same network. Version 2023.9 or later. Older versions work too, but the template syntax might differ slightly.
The integration itself is lightweight. No additional packages, no new add-ons. Just Home Assistant doing what it does best: making HTTP calls and processing the results.
Testing the LibreTranslate API First
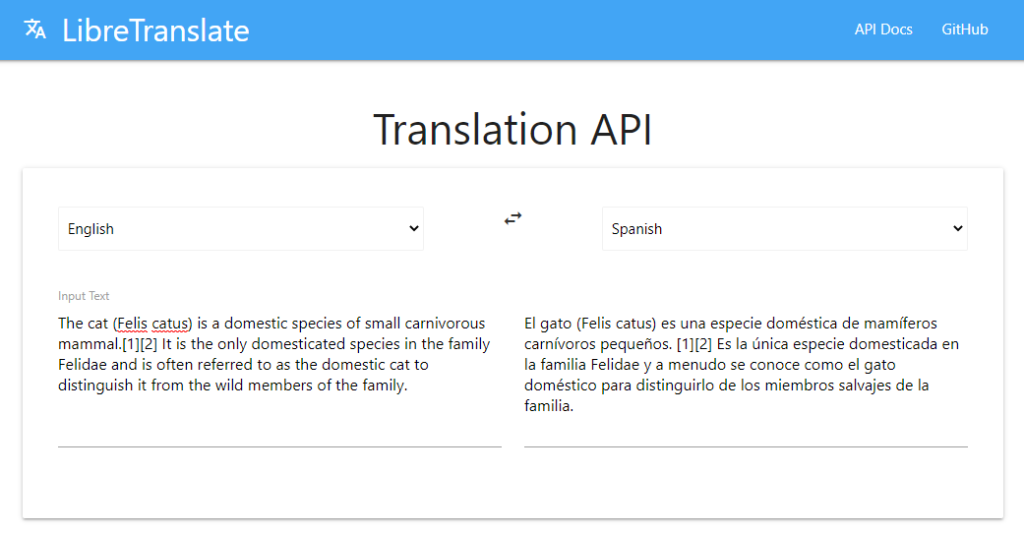
Before wiring this into Home Assistant, confirm LibreTranslate is actually responding. SSH into your homelab box and run a basic curl request.
curl -X POST http://libretranslate.local:5000/translate
  -H "Content-Type: application/json"
  -d '{"q": "Hola, como estás?", "source_language": "es", "target_language": "en"}'
  | jq .
You should get back JSON with a translatedText field containing the English translation. If you get a 502 or timeout, LibreTranslate isn’t running or your hostname is wrong. Fix that first. The REST API is dead simple, but it has to be reachable.
Note that language codes are lowercase ISO 639-1 codes: es for Spanish, fr for French, de for German, en for English. Auto-detect works too if you pass source_language: "auto".
Creating a Template Sensor in Home Assistant
Home Assistant’s template integration is where we’ll store the translation logic. This is the cleanest way to make it reusable. Open your configuration.yaml or create a new file in the packages directory if you’re using split configuration.
template:
  - trigger:
      - platform: homeassistant
        event: start
    sensor:
      - name: "Translate Text"
        unique_id: translate_text_sensor
        state: "ready"
        attributes:
          last_translation: ""
That’s a placeholder. The real work happens in a script, which is where you make the HTTP call. Let me show you the working version.
Writing the Translation Script
Create a new file at config/scripts.yaml or add to your existing scripts configuration. This script accepts three variables: the text to translate, the source language, and the target language.
translate_text:
  description: "Translate text using LibreTranslate"
  fields:
    text:
      description: "Text to translate"
      example: "Buenos días"
    source_lang:
      description: "Source language code (e.g., es, fr, auto)"
      example: "es"
    target_lang:
      description: "Target language code (e.g., en, de)"
      example: "en"
  variables:
    api_url: "http://libretranslate.local:5000/translate"
  sequence:
    - service: rest_command.translate
      data:
        text: "{{ text }}"
        source: "{{ source_lang }}"
        target: "{{ target_lang }}"
Now define the actual REST command in configuration.yaml:
rest_command:
  translate:
    url: "http://libretranslate.local:5000/translate"
    method: POST
    content_type: "application/json"
    payload: '{"q": "{{ text }}", "source_language": "{{ source }}", "target_language": "{{ target }}"}'
This works, but there’s a catch: the response comes back asynchronously, and Home Assistant’s REST command integration doesn’t naturally store the response in a sensor. You need a workaround.
Storing and Retrieving the Translation
The solution is to use an automation that calls the REST command, then parses the response and stores it in an input_text helper. First, create the helper:
input_text:
  last_translation:
    name: "Last Translation Result"
    max: 500
Then an automation that does the translation and captures the result:
automation:
  - alias: "Translate incoming text"
    description: "Call LibreTranslate and store result"
    trigger:
      platform: state
      entity_id: input_text.text_to_translate
    condition:
      condition: template
      value_template: "{{ trigger.to_state.state != 'unknown' }}"
    action:
      - service: rest_command.translate
        data:
          text: "{{ states('input_text.text_to_translate') }}"
          source: "{{ states('input_select.source_language') }}"
          target: "{{ states('input_select.target_language') }}"
      - delay:
          seconds: 2
      - service: input_text.set_value
        target:
          entity_id: input_text.last_translation
        data:
          value: "{{ state_attr('rest_command.translate', 'last_response') }}"
Honestly, this is where the integration gets clunky. The REST command doesn’t natively expose response data as state or attributes, so you’re working around Home Assistant’s architecture a bit. It still works, but it’s not elegant.
A cleaner approach uses a Python script, but that requires SSH access and adds complexity. For most homelabs, the automation-based approach is sufficient. You get a 1-2 second delay between request and result, which is acceptable for notifications and batch processing.
Real-World Example: Translating Weather Alerts
Let’s say you have a weather integration that sometimes returns alerts in Spanish. You want them translated to English automatically. Wire it up like this:
automation:
  - alias: "Translate weather alert"
    description: "When weather alert arrives in Spanish, translate to English"
    trigger:
      platform: state
      entity_id: sensor.weather_alert
    condition:
      condition: template
      value_template: "{{ trigger.to_state.state != unknown }}"
    action:
      - service: rest_command.translate
        data:
          text: "{{ trigger.to_state.state }}"
          source: "es"
          target: "en"
      - delay:
          seconds: 2
      - service: notify.mobile_app_phone
        data:
          message: "Weather Alert (translated): Check input_text.last_translation"
          data:
            tag: "weather_alert"
This catches the alert, sends it to LibreTranslate, waits for the response, and notifies your phone with a pointer to where the result landed. It’s not the most refined flow, but it works and everything stays on your network.
Performance and Gotchas
Translation isn’t instant. Even on decent hardware, LibreTranslate takes 1-3 seconds per request depending on text length and the language pair. German-to-English is faster than Chinese-to-English. Plan your automations with that delay in mind.
Long texts hit the API response size limit. LibreTranslate’s default max is around 500 characters per request. If you’re translating a paragraph, split it or increase the server’s payload limit in the Docker config.
Language code mismatches will fail silently or throw unhelpful errors. Double-check your ISO 639-1 codes. es for Spanish, not sp. It’s a small thing but it burns time.
If LibreTranslate is offline, the REST command times out and the automation stalls. Your notification never sends. Build in error handling: check if LibreTranslate is responding before you fire the translation automation, or wrap it in a try-catch pattern using a script.
FAQ
Can I use LibreTranslate with Home Assistant without editing YAML?
Not cleanly. The UI doesn’t expose REST commands or translation-specific automations. You can create basic automations through the visual editor, but the REST integration requires YAML config. If you’re running Home Assistant OS on a device like the Green or a Pi, you can edit config files through Samba or the file editor add-on.
What if LibreTranslate and Home Assistant are on different subnets?
Use the full IP or DNS name of the LibreTranslate server instead of a hostname. If they’re on truly different subnets, you may need to adjust firewall rules or use a reverse proxy. A Traefik instance in front of LibreTranslate works well if you’re already routing through it.
Does this work with Home Assistant Cloud?
Yes. Home Assistant Cloud is just a way to expose your instance remotely. Local API calls between Home Assistant and LibreTranslate don’t go through the cloud. The translation stays private.
How many translations can LibreTranslate handle per second?
On a single CPU core, roughly one translation every 1-2 seconds. If you’re blasting it with 10 simultaneous requests, you’ll queue up. Add CPU cores or run multiple LibreTranslate instances behind a load balancer if you need higher throughput. Most home labs don’t hit that limit.
Can I trigger translations from a Home Assistant dashboard button?
Yes. Create an input_text helper for the text, input_select helpers for source and target language, and a button card that triggers the translate script. The result appears in another input_text helper that you can display on the dashboard.
This integration is useful but not invisible. You’re building around Home Assistant’s constraints instead of using a purpose-built tool. If you find yourself needing heavy translation logic, consider whether a separate service with a proper API wrapper might be cleaner. For occasional alert translation or notification cleanup, this automation-based approach gets the job done without overhead.
Explore LibreTranslate in our AI Homelab Toolkit.