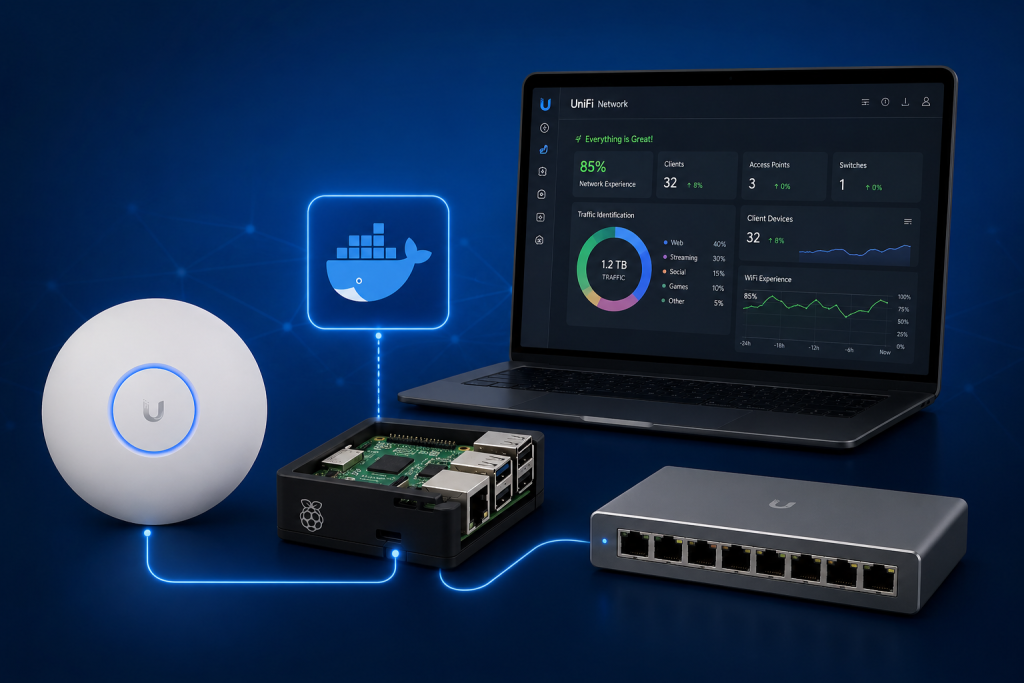
UniFi gear is the homelab default for a reason — it’s feature-rich, rock-solid, and “just works.” But every UniFi network needs a controller to configure devices, push firmware, hold the database of clients, and manage RF settings across multiple APs. The controller normally costs you a Cloud Key (~$200), a UniFi Dream Machine (~$400), or a dedicated VM you have to maintain. There’s a better way: run it on a Raspberry Pi for under $80 total.
This guide walks through the modern 2026 setup using Raspberry Pi OS Bookworm, Java 17, MongoDB 7, and the official Ubiquiti APT repo — none of the deprecated apt-key, OpenJDK 7, or Jessie nonsense from older guides.
If you only have 1–3 APs at home and don’t need VLANs / RADIUS / guest portals, run them standalone via the UniFi mobile app and skip this guide entirely.
Hardware requirements
| Component | Minimum | Recommended |
|---|---|---|
| Pi model | Pi 4 (2GB RAM) | Pi 5 (4GB+) or Pi 4 (4GB+) |
| Storage | 16GB SD card (Class 10) | 32GB+ Samsung Pro Endurance SD or USB SSD (much better — MongoDB hates SD wear) |
| Power | Official 5V/3A supply | Official Pi 5 27W supply if using Pi 5 |
| Network | Wi-Fi works but ethernet is required for production stability | Wired ethernet — period |
| Cooling | Heatsink | Active fan case (Pi 5 throttles under sustained MongoDB load) |
UniFi Network Application + MongoDB needs ~600MB RAM idle and bursts to 1.2GB+ during config pushes. Anything under 2GB will swap constantly and corrupt the database eventually.
Step 1 — Install Raspberry Pi OS
Use Raspberry Pi OS Lite (Bookworm, 64-bit) — no desktop, less bloat. Flash it via the official Pi Imager. In the Imager’s “Advanced options” (gear icon):
- Set hostname (e.g.,
unifi-controller) - Enable SSH
- Set username/password
- Configure your Wi-Fi if needed (or skip and use ethernet)
- Set locale/timezone
Boot the Pi, SSH in: ssh [email protected]
Step 2 — Update + base packages
sudo apt update && sudo apt full-upgrade -y
sudo apt install -y ca-certificates curl gnupg apt-transport-https
Step 3 — Install Java 17 (required by UniFi 8.x)
UniFi Network Application 8.x requires Java 17. Java 7/8/11 will not work:
sudo apt install -y openjdk-17-jre-headless
java -version  # should show "17.x"
Step 4 — Install MongoDB
MongoDB doesn’t ship a native ARM64 build for newer versions on Debian, so we use the version bundled in Pi OS (compatible with UniFi 8.x):
sudo apt install -y mongodb-server-coreNo need to start mongod yourself. The UniFi service spawns its own MongoDB process on port 27117 (note: not the default 27017). If a system mongod is running on 27017, leave it — it won’t conflict.
Step 5 — Add Ubiquiti’s APT repo (modern GPG keyring method)
The old apt-key command is deprecated since Debian 11. Use the new keyring method:
# Download Ubiquiti's signing key into the modern keyring location
sudo install -m 0755 -d /etc/apt/keyrings
curl -fsSL https://dl.ui.com/unifi/unifi-repo.gpg | \
  sudo gpg --dearmor -o /etc/apt/keyrings/unifi.gpg

# Add the repo (signed-by points to our keyring)
echo "deb [signed-by=/etc/apt/keyrings/unifi.gpg] https://www.ui.com/downloads/unifi/debian stable ubiquiti" | \
  sudo tee /etc/apt/sources.list.d/100-ubnt-unifi.list

sudo apt update
Step 6 — Install UniFi Network Application
sudo apt install -y unifi
sudo systemctl enable unifi
sudo systemctl start unifi

# Watch it start (first run takes 60-90 seconds)
sudo journalctl -u unifi -f
When you see Starting unifi: STARTED, hit Ctrl+C and visit https://<pi-hostname-or-ip>:8443 in your browser. You’ll get a self-signed cert warning — accept it, then walk through the UniFi setup wizard.
Step 7 — Verify the service is listening
netstat is deprecated in modern Pi OS. Use ss:
sudo ss -tlnpYou should see UniFi listening on these ports:
- 8080 — device communication (UDP also)
- 8443 — admin web UI (HTTPS)
- 8843 — guest portal HTTPS
- 8880 — guest portal HTTP redirect
- 27117 — UniFi-bundled MongoDB (localhost only)
Step 8 — Log rotation (optional but recommended)
UniFi logs to /var/log/unifi/ and grows fast. Add log rotation:
sudo tee /etc/logrotate.d/unifi > /dev/null <<'EOF'
/var/log/unifi/*.log {
    daily
    rotate 7
    missingok
    compress
    delaycompress
    notifempty
    copytruncate
}
EOF
Bonus 1 — HTTPS on port 443 (instead of :8443)
Tired of typing :8443? Redirect ports 80 → 8080 and 443 → 8443 with nftables (modern replacement for iptables on Bookworm):
sudo apt install -y nftables
sudo systemctl enable --now nftables

sudo tee /etc/nftables.conf > /dev/null <<'EOF'
#!/usr/sbin/nft -f
flush ruleset

table inet nat {
    chain prerouting {
        type nat hook prerouting priority dstnat;
        tcp dport 80 redirect to :8080
        tcp dport 443 redirect to :8443
    }
}
EOF

sudo systemctl restart nftables
Now https://unifi-controller.local works without the port. Verify with sudo nft list ruleset.
Bonus 2 — Replace the self-signed cert
The browser warning gets old. Two paths depending on whether your controller is reachable from the internet:
Option A — Let’s Encrypt (controller exposed to internet)
Use the popular le-unifi-os script or certbot + manual import. The certificate import flow:
sudo apt install -y certbot
sudo certbot certonly --standalone -d unifi.example.com

# Import into UniFi's Java keystore
cd /var/lib/unifi
sudo java -jar /usr/lib/unifi/lib/ace.jar import_cert \
  /etc/letsencrypt/live/unifi.example.com/fullchain.pem \
  /etc/letsencrypt/live/unifi.example.com/privkey.pem
sudo systemctl restart unifi
Then add a cron job to auto-renew + re-import every 60 days.
Option B — Internal CA (LAN-only controller)
Generate a CSR, sign it with your homelab CA (or use mkcert for laptop-trusted certs), then import:
cd /usr/lib/unifi
sudo java -jar lib/ace.jar new_cert \
  unifi.lan "Mustafa Homelab" Dubai DXB AE
# Sign the CSR at /var/lib/unifi/unifi_certificate.csr.pem
# Then import the resulting cert + chain
sudo java -jar lib/ace.jar import_cert \
  /var/lib/unifi/unifi.cert.pem \
  /var/lib/unifi/intermediate.cert.pem \
  /var/lib/unifi/root.cert.pem
sudo systemctl restart unifi
Bonus 3 — Auto-backups
Configure UniFi to auto-backup to an external location. In the UI: Settings → System → Backup → Auto Backup → Enable. Then sync /var/lib/unifi/backup/autobackup/ to a NAS or cloud:
# Daily rsync to a Synology / NAS at 3am
sudo crontab -e
# Add:
0 3 * * * rsync -a /var/lib/unifi/backup/autobackup/ [email protected]:/volume1/backups/unifi/
Common issues
UniFi service won’t start, journalctl shows Java errors
99% of the time it’s wrong Java version. Run java -version — must be 17.x. If you accidentally installed multiple JDKs, run sudo update-alternatives --config java and pick the 17 one.
Devices show “Adoption failed” or stuck on “Pending”
SSH into the AP (ssh ubnt@<ap-ip>, default password ubnt) and run set-inform http://<controller-ip>:8080/inform. Click “Adopt” in the controller, repeat the set-inform once.
High SD-card wear / SD corruption
MongoDB writes constantly. Either use a Samsung Pro Endurance SD, OR boot from USB SSD (Pi 4/5 supports this natively). USB SSD is the better long-term play — UniFi DBs survive years of writes vs months on consumer SD.
Memory pressure / Pi swapping
If your Pi has <4GB RAM, edit /etc/default/unifi and add JAVA_OPTS="-Xmx512M" to cap heap size. Default tries to use 1GB.
Alternatives to a Pi controller
- UniFi Cloud Key Gen2 / Plus — official appliance, $200, just works, but you’re paying for a glorified Pi with a UPS battery
- UniFi Dream Machine SE / Pro — gateway + controller in one, $400-700, ideal if you also need a router upgrade
- Docker on a NAS / homelab —
linuxserver/unifi-network-applicationimage runs anywhere Docker does. Great if you already have a Synology / Proxmox server - Standalone mode (no controller) — for 1-3 APs at home, see our UniFi standalone guide
FAQ
Can I run the UniFi controller on a Raspberry Pi 5?
Does the controller have to be online 24/7?
What’s the difference between UniFi Network and the old UniFi Controller?
unifi. The version we’re installing here is 8.x.Can I migrate an existing Cloud Key backup to my Pi controller?
set-inform http://<new-pi-ip>:8080/inform.Should I run UniFi controller in Docker on the Pi instead?
Related guides
- 📡 Setup UniFi AP standalone (no controller needed)
- 🛜 UniFi WiFi 6 vs WiFi 7 comparison
- 🐳 Install Portainer on Synology (great companion for managing the UniFi Docker option)
Last updated: 2026-04-22. Tested on Raspberry Pi 5 8GB running Pi OS Bookworm 64-bit, Java 17, UniFi Network Application 8.5.
Recommended Hardware & Hosting
Build your homelab with hardware tested and used by our team.
Affiliate links — we may earn a small commission at no extra cost to you.