Installing UniFi Access Points (APs) without a controller involves adopting a standalone UniFi AP and configuring it through the UniFi app or web interface. Here’s a step-by-step guide:
Note: This guide assumes you have a basic understanding of networking concepts and have already physically installed the UniFi AP.
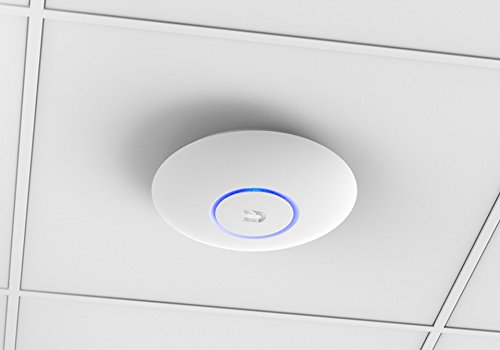
Step 1: Connect to UniFi AP
- Connect the UniFi AP to your network using an Ethernet cable.
- Power on the UniFi AP using the provided power source or Power over Ethernet (PoE) injector.
Step 2: Find UniFi AP IP Address
- Check your router’s DHCP lease table or use a network scanning tool to find the IP address assigned to the UniFi AP.
Step 3: Access UniFi AP Web Interface
- Open a web browser and enter the UniFi AP’s IP address in the address bar.
- The default username is
ubnt, and the default password isubnt. Enter these credentials to log in.
Step 4: Configure UniFi AP
- Once logged in, go to the “Settings” tab.
- Under the “Wireless Networks” section, configure your wireless network settings, including SSID and security options.
Step 5: Save Changes
- After configuring the wireless network, click on the “Apply Changes” button to save your settings.
Step 6: Test Wireless Connectivity
- Disconnect the UniFi AP from the network temporarily to test its standalone functionality.
- Reconnect to the UniFi AP’s wireless network using a Wi-Fi-enabled device to ensure it’s broadcasting the configured SSID and providing internet access.
Step 7: Optional – Static IP Assignment
- For a more stable setup, consider assigning a static IP address to the UniFi AP. This is typically done in your router’s DHCP settings.
The gear I run for this
Hardware from my own homelab, relevant to this guide — direct Amazon links.
Affiliate links — I earn a small commission at no extra cost to you. Browse my full homelab store →
Step 8: Document Settings
- Record the IP address and configuration settings for future reference.
Notes:
- Without a UniFi controller, some advanced features such as centralized management and statistical analysis will be unavailable. However, basic wireless functionality will still work.
- If you plan to expand your UniFi network in the future, consider setting up a UniFi controller to manage multiple APs from a centralized interface.
UniFi AP Standalone — Complete 2026 Guide
Since UniFi firmware 5.43, every modern UniFi access point supports standalone mode via the UniFi Network app (iOS/Android). You don’t need a Cloud Key, Dream Machine, or controller software running 24/7. Configure once, manage when needed.
Which UniFi devices work in standalone mode?
| Device | Standalone supported? | Notes |
|---|---|---|
| U6 Mesh, U6+, U6 Pro, U6 Enterprise | ✅ Yes | Best for 2026 standalone setups |
| U7 Pro, U7 Pro Wall, U7 Pro Max | ✅ Yes | Wi-Fi 7 flagship — full standalone |
| UAP-AC-Lite / LR / Pro / Mesh | ✅ Yes (firmware 5.43+) | Still one of the best budget buys |
| UAP-AC-HD, UAP-nanoHD, UAP-IW-HD | ✅ Yes | Enterprise-class, works standalone |
| UniFi Switches (USW-Lite, Flex Mini, USW-24) | ✅ Yes | Same UniFi Network app flow |
| UAP (1st gen, AP-LR pre-AC) | ❌ No | Too old — needs controller |
What you’ll need
- A UniFi AP (from the table above)
- A PoE source — either a PoE switch or the PoE injector Ubiquiti ships in the box
- The UniFi Network app (iOS / Android)
- A phone on the same Wi-Fi/LAN as the AP (for first-time adoption)
Step-by-step: Set up a UniFi AP without a controller
- Power the AP. Plug the Ethernet cable into the PoE injector’s “POE” port, then run another cable from “LAN” to your router. (Skip the injector if you have a PoE switch.)
- Wait 60 seconds for the LED to settle on steady white — this means it’s booted and broadcasting a setup SSID.
- Open the UniFi Network app on your phone. Tap the “+” to add a standalone device. The app will scan for the AP automatically.
- Adopt the device. Tap your AP in the list, then “Set up standalone”. Set an admin password and a local name.
- Create your Wi-Fi SSID. Add SSID name + WPA3 password. For most homes, leave defaults (dual-band auto, no guest network).
- Apply. The AP reboots. After ~90 seconds, your new Wi-Fi is live.
Common issues
- AP won’t adopt / stuck on “Adopting”: Factory reset (hold the reset pin for 10 seconds until LED blinks). Most “controller-orphaned” APs from eBay need this.
- App can’t find the AP: Phone must be on the same subnet. Disable mobile data while adopting.
- Slow speeds vs. advertised: Check PoE source — a 100Mbit PoE injector bottlenecks gigabit APs. Use gigabit PoE.
- Wi-Fi 7 / WPA3 incompatible with older devices: In the SSID settings, choose “WPA2/WPA3 (mixed)” for backward compatibility.
Mesh setup without a controller
You can mesh 2-3 UniFi APs in standalone mode: set them all up as standalone on the same subnet, then in the app, adopt the second/third AP and it automatically joins as a mesh node. For larger deployments (4+ APs) or enterprise features (VLAN guest networks, RADIUS), you’ll want to step up to the UniFi Dream Machine or a controller.
FAQ
Can I set up a UniFi AC Pro without a controller?
Yes, since firmware 5.43 the UAP-AC-Pro supports full standalone mode via the UniFi Network mobile app. Factory reset the AP, power it up, then adopt it directly from your phone — no Cloud Key, Dream Machine, or laptop running UniFi Controller needed.
Do I lose features without a UniFi controller?
You keep: SSID management, WPA3, band steering, PoE control, per-AP RF tuning, firmware updates. You lose: site-wide VLANs, RADIUS/802.1X auth, guest portals with captive pages, fine-grained analytics, and seamless roaming across many APs. For a 1-3 AP home or small office, standalone is more than enough.
Can I mesh UniFi APs without a controller?
Yes, up to 2-3 APs. Set them up as standalone on the same subnet, then adopt additional APs from the mobile app — they automatically join as mesh/wireless uplink nodes. For 4+ APs or advanced mesh tuning, a Dream Machine or controller is recommended.
Can I set up a UniFi switch without a controller?
Yes — the same UniFi Network app adopts switches (USW-Lite, Flex Mini, USW-24) standalone. VLAN tagging, PoE control, and port profiles all work. You only need a controller for mirror ports, static routing, or LACP/LAG across many switches.
Last updated: 2026-04-20. Tested with UniFi Network app v10.x on iOS 17/18 and Android 14/15, firmware 7.x on all current APs.